Oreo Blondies
Oreo Blondies: The Ultimate Cookie Meets Dessert Mash-Up
I don’t know about you, but something about Oreos is so addicting, and I absolutely love how versatile they can be in desserts.
Are you ready to take your sweet tooth on a wild ride? Imagine the chewy, buttery goodness of a classic blondie, but with a twist—packed with irresistible Oreo cookies! These Oreo blondies are the dessert hybrid you didn’t know you needed, and once you try them, you’ll wonder how you ever lived without them.
I still wonder about this myself.
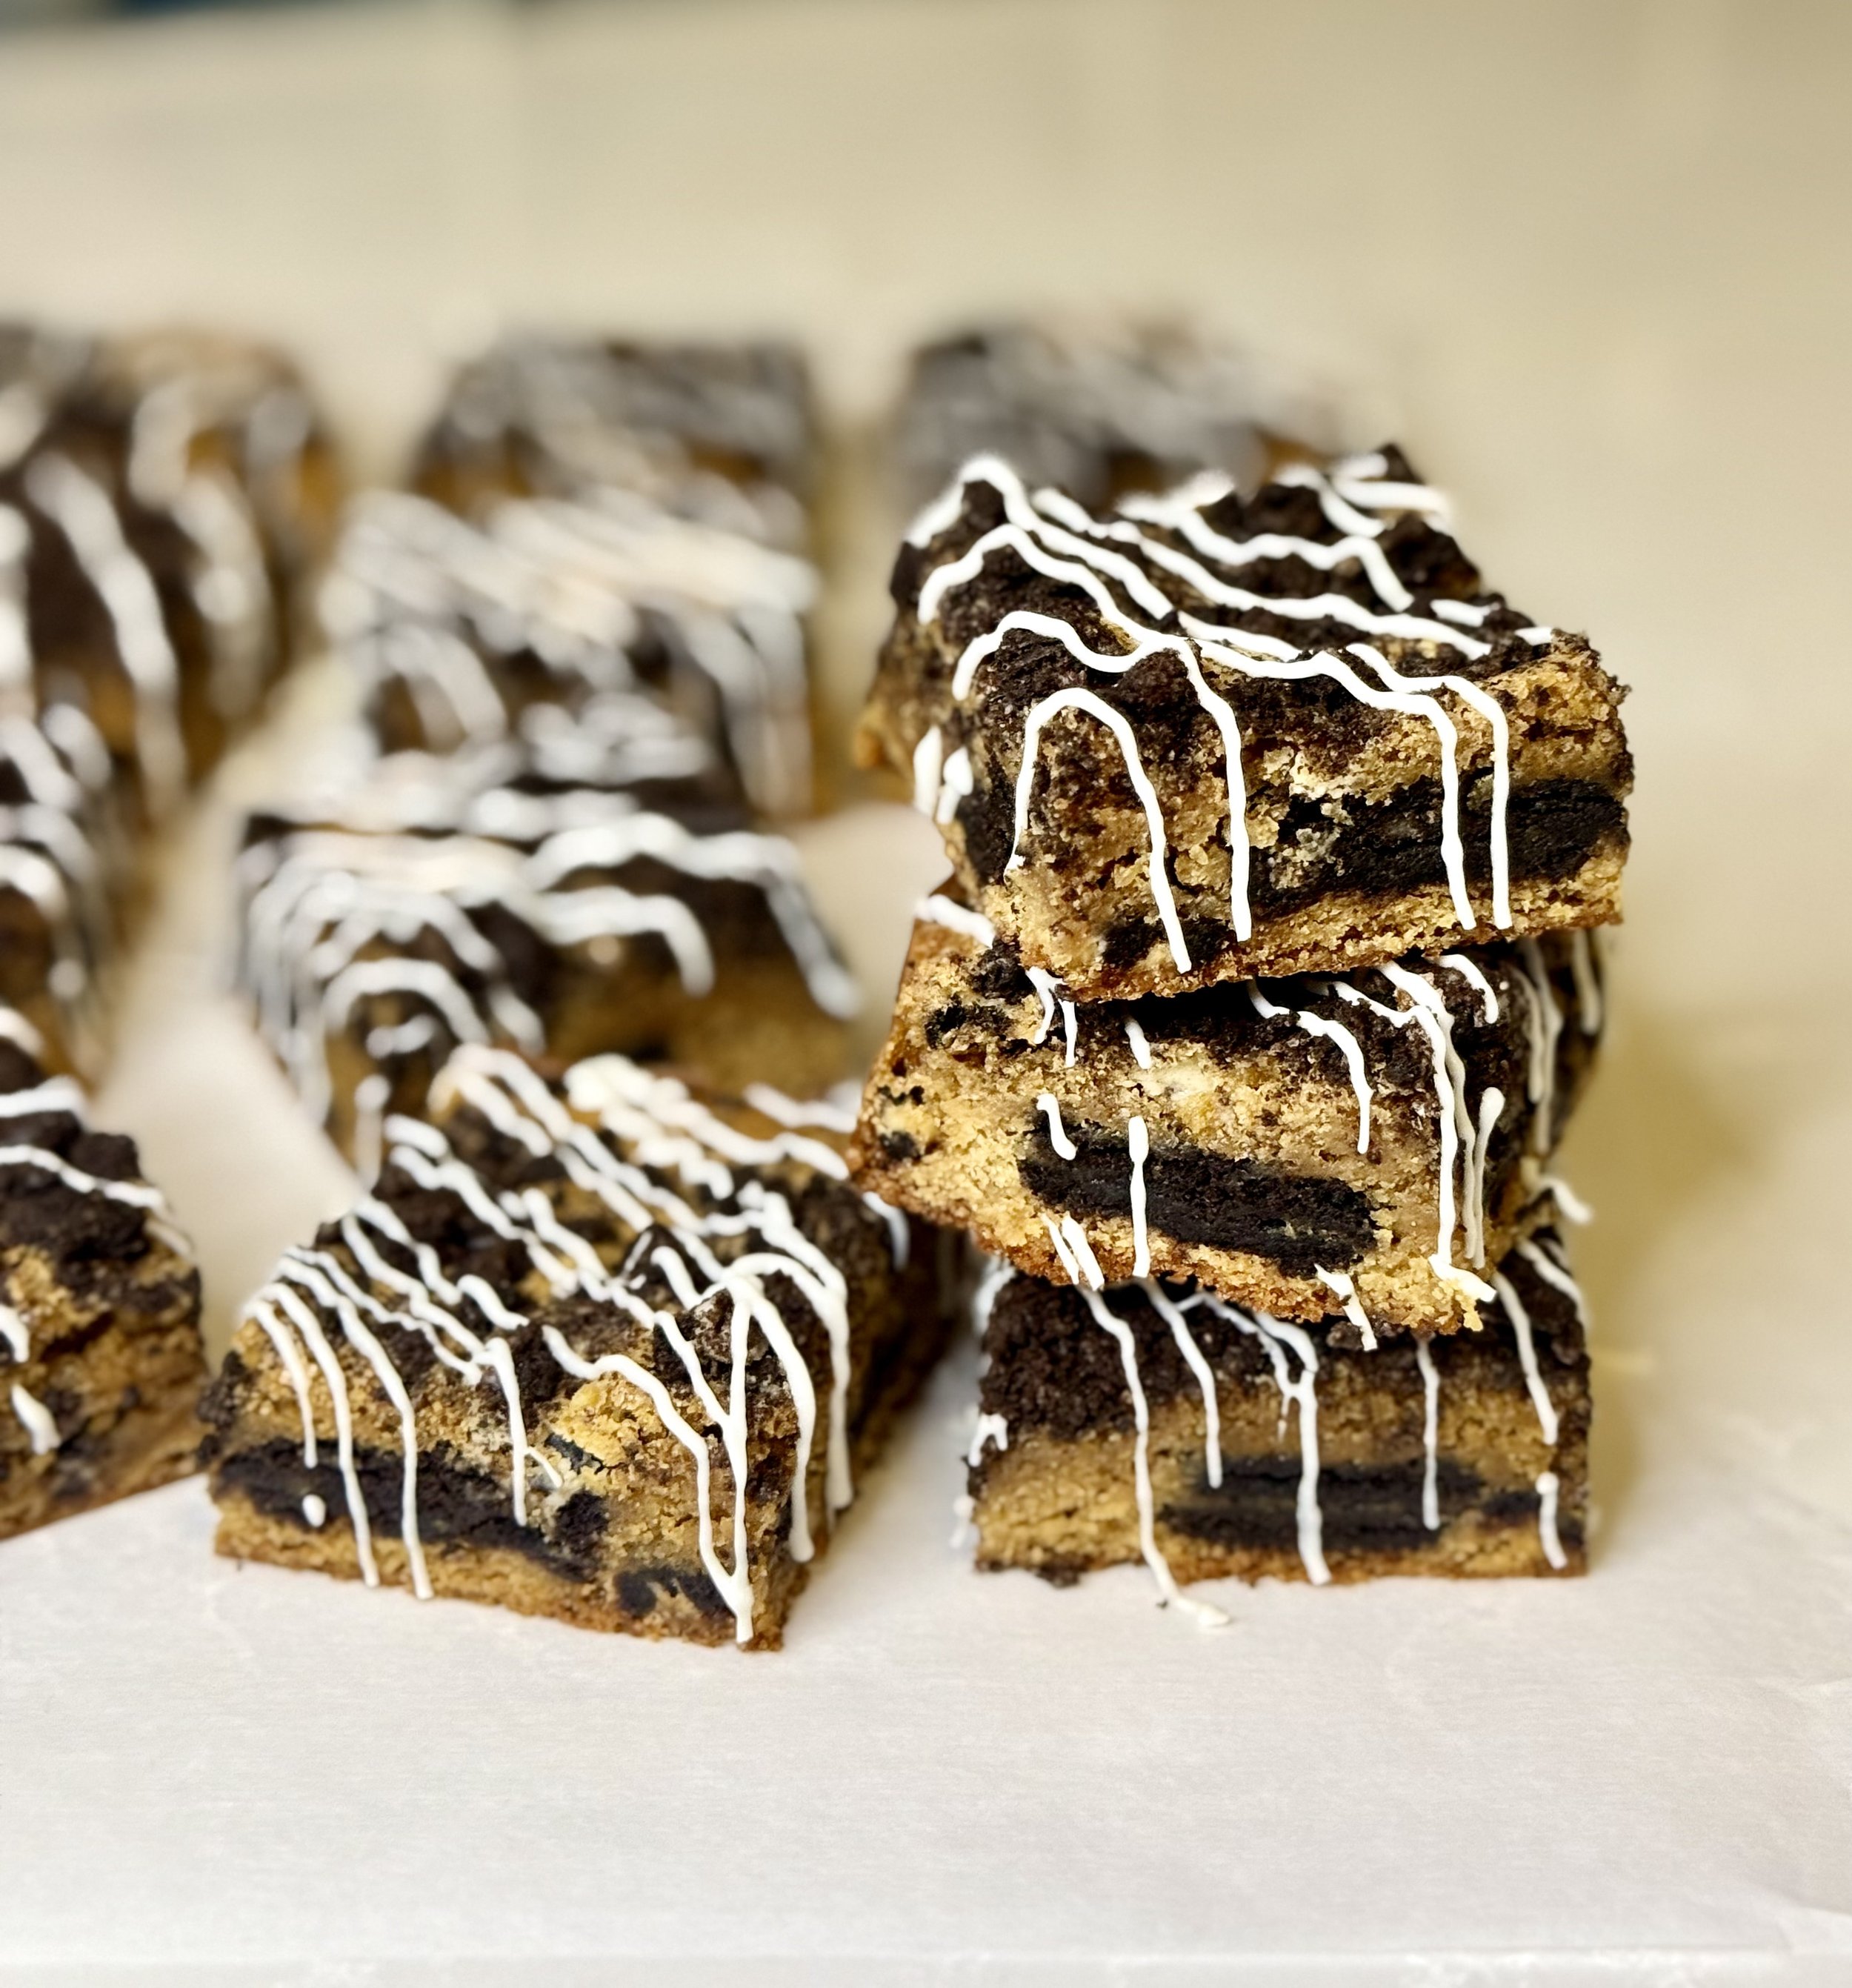
First, let's talk about the blondie base. It’s soft, slightly chewy, and has that rich, melt-in-your-mouth texture that only butter and brown sugar can provide. It's the perfect canvas for whatever delicious add-ins you want. But today, we’re all about the Oreos. These cookies add the perfect amount of crunch and a burst of chocolatey flavor that complements the sweet vanilla blondie base like a match made in dessert heaven.
Now, why Oreo blondies, you ask? Well, it's simple: Oreos are a classic, universally loved treat that everyone can agree on. Whether you're dunking them in milk, crumbling them over ice cream, or—wait for it—baking them right into your favorite desserts, they never disappoint. And in this blondie form, they're not just a topping or a mix-in; they become part of the magic. Each bite brings the nostalgic taste of an Oreo but with the added fun of gooey, rich blondie goodness.
What’s even better? These Oreo blondies are ridiculously easy to make. No need to fuss with complicated ingredients or techniques. Just melt, mix, and bake! They’re perfect for when you’re craving something sweet but don’t want to spend hours in the kitchen.

You’ll be the hero of your next get-together, bake sale, Netflix binge session, or for yourself to enjoy.
Storing
To keep your Oreo blondies fresh and delicious, follow these simple storage tips:
Room Temperature: If you plan to eat them within 3-4 days, just store them in an airtight container at room temperature. This will help maintain their chewy texture without them getting too dry.
Refrigeration: For longer storage (up to a week), you can place them in an airtight container in the fridge. Just let them come to room temperature before serving, or microwave for a few seconds for that freshly baked taste!
Freezing: If you want to keep them for a longer period, you can freeze them! Wrap the blondies tightly in plastic wrap, then place them in a freezer-safe bag or container. They’ll stay fresh for up to 3 months. Just thaw them at room temperature or warm them up in the microwave when you're ready to indulge!
Enjoy your delicious treats! 🍪✨- I’m now wondering why there isn’t an Oreo emoji.

If you haven’t scrolled down to the recipe and are still reading, first, thank you, but second, baking is so fun. I’ve been passionate about baking/cooking since a young age. Playing “restaurant” with my cousins and siblings or whipping the strangest concoctions. It’s so much fun and rewarding, especially when you make something people enjoy. However, baking comes with much trial and error, which is something I am still learning. The worst thing is when you make something so many times, and on this random occasion, it was messed up. - THE WORST
Anyway, after college, I decided to learn more about how to bake/cook, with much inspiration coming from TikTok videos. As I went back to college to pursue a master’s degree, I realized how therapeutic baking is for me, and whether or not it brings you the same joy, simply baking my favorite recipes, coming up with different concoctions, and sharing them with you continues to be so rewarding for me. If you’re still here, thanks for coming to my TedTalk ;).

If you find yourself making this recipe, I’d love to hear your thoughts and if you have any suggestions! Comment below or tag me on my socials! I hope you enjoy these blondies.

Oreo Blondies
Ingredients
- ½ cup unsalted butter (melted)
- 1 cup brown sugar
- 2 eggs (room temperature)
- 1 tbsp vanilla extract
- 1 cup of all-purpose flour
- 1 Hershey's Cookies and Cream Chocolate Bar (1.55 ounces)
- 24 Oreos (18 for filling, 6 for crushed topping)
- ¼ tsp of baking powder
- ½ tsp salt
- 1/2 cup white chocolate chips
- 1/2 tsp coconut oil
Instructions
- Preheat the oven to 350 degrees and line a 9x9 pan with parchment paper.
- Melt the ½ cup of butter and allow to cool slightly. While the butter cools, crush 6 of your Oreos for the topping and chop the Hershey's Cookies and Cream Chocolate Bar.
- Add the melted butter and brown sugar to a mixing bowl and mix with a spatula until combined.
- Add the eggs and vanilla extract and mix until just combined.
- Use a spatula to scrape down the sides and add the flour, baking powder, and salt. Fold the ingredients together until no clumps of flour remain without overmixing.
- Scoop a couple of dollops into the prepared baking pan, spreading a thin, even layer (it may be a little tough). Next, place 18 full oreos throughout the thin layer of mixture. Add the chopped chocolate bar pieces on top of the Oreos.
- Next, add the remaining batter and carefully spread the mixture over the blondies. Finally, sprinkle the crushed Oreos over the top of the blondies.
- Bake for 30-35 minutes or until the edges are golden brown. Allow to cool.
- Once cooled, make the white chocolate drizzle. Melt the 1/2 cup of white chocolate chips with 1/2 tsp of coconut oil (can use vegetable shortening) and microwave in 20-second intervals, mixing each time until smooth. Use a spoon, spatula, or zip-loc bag to drizzle the white chocolate over the blondies. Enjoy!
- 9x9 baking pan
- Parchment paper
- Wire rack
- Spatula
- Bowl